Nessus
- KevinsinghJ
- Feb 24
- 7 min read
In this article, I'll be discussing Nessus. It's a widely used vulnerability scanning tool that helps organizations identify and assess potential security risks in their IT infrastructure. It scans systems, networks, and applications for vulnerabilities, such as missing patches, misconfigurations, or weaknesses that hackers could exploit. Nessus also generates detailed reports that provide insights into potential security issues and their severity, helping IT teams prioritize remediation efforts.
I’ll start with how to get it installed and then on how we can utilize the capability of it.
Installation
Go over to link https://www.tenable.com/downloads/nessus?loginAttempted=true
Like in my example here, I'm getting it installed for my Kali Linux machine.

After the download is complete, i’ll move over to my terminal and run command cd Downloads (to change the directory) followed by command ls (to list down the files in the directory)

Followed by the command sudo dpkg -i Nessus-10.8.3-debian10_amd64.deb (to install Nessus).
Once the installation is completed, run another command sudo systemctl start nessusd (this is to run the services). And to verify whether has the services started, run command sudo systemctl status nessusd

Since it’s confirmed that its running, we can move forward to the browser to and key-in https://localhost:8834

Click on Advanced… and click on Accept the Risk and Continue
You’ll be redirected to this page below then

Do not do anything as of yet. Next step is to open another tab and go over to https://www.tenable.com/products/nessus/nessus-essentials

As you can see, you’ll need to register for the activation code. Business email is needed for that, to obtain it you can open another tab and go over to https://temp-mail.org/en/

I have copied the email and i’ll go back to the web page where the registration is required. I’ll fill in my First and Last name followed by the copied email before clicking on Get Started

And then go back to the webpage where we copied the email, scroll down a little bit and open up this email to obtain the activation code

Copy the code that is shown there and move over to where we can access Nessus at https://localhost:8834
Click on Continue, then choose Register for Nessus Essentials and instead of filling up the information, click on skip (because we already have the activation code)

Paste the activation code and click on Continue. Then you’ll be prompted to create a user account. Input a username and preferred password and then click on Submit
And then it’ll show that plugins are being downloaded, we’ll have to allow some time for it to be completed.

Once done, you’ll be re-directed to the portal. On top the top right of the portal, this spinning wheel shows that the plugins are being compiled and it’ll also show the progress of it

Moving on to the next part once the compiling is done.
Utilizing Nessus
Now, Nessus is a fairly simple tool to use and I'll be showing the process of discovering hosts on a network, performing vulnerability scans on these hosts, identifying critical information of the vulnerabilities and generating reports. This is all done in the context of penetration tests, we’re basically identifying vulnerabilities for the purpose of exploitation.
Let’s start by clicking on a new scan
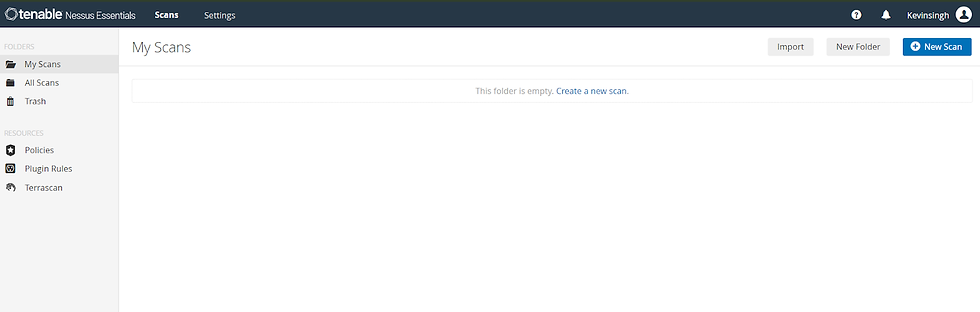
Once you click on it, you’d be redirected to scan templates, where you’ll be able to see many options as below.

These options will allow you to customize or to specify which type of scan you’ll like to perform. Some options will require an upgraded plan of Nessus. in our case since we’re using just Nessus Essentials, we’ll start off by clicking on Host Discovery in order to identify what hosts are active on our network
Host Discovery Scan

As I clicked on it, the above page appeared where I keyed-in the name of the scan which is Home Discovery - Local Network (you can key in anything) and my target, which is 192.168.100.1/24 (I provided my network range because I'd like to identify all hosts within my network). I could also upload a file as shown above in the option Add File, this is if I have stored my hosts within a file.
Once i’m done inputting the information, i could just click on the down arrow beside Save and click on Launch

And once that’s clicked, it’ll show below screen and we’ll have to wait till it’s completed

Once the scan was completed, i clicked on it and below result was shown:-

Let me give a brief explanation of above screenshot:
Those are the hosts are that currently active within my network, 3rd one being my own pc that i’m running on now (a windows machine), it’s pretty obvious too with all those opened ports
We’d be able to filter the result, through Port, Protocol, Hostname and much more options
Here we’d be able to have a look at the Vulnerabilities that are found in the hosts (to be honest nothing much will be shown as this is just a host discovery scan) and History (on when the scan was performed)
In a few options here, for this scan the only one that seems important is Report, whereby we’d be able to generate the report to a file of this discovery scan

I’m able to choose the format of the report which is either HTML or CSV and I can also filter the information that I need to be generated in the report as shown above.
Here the scan details are shown, the severity base shows that it’s using the Common Vulnerability Scoring System 3.0 (CVSS v3.0)
Here a pie chart is shown and the color will be shown based on the severity of the vulnerabilities, Burgundy being Critical, Red being High, Yellow being Medium, Green being Low and Blue being Info (which is what shown for our scan, since it’s just a Hosts Discovery Scan)
Templates (SideBar Options)
Let me click on Host Discovery Scan again, as if we’re performing a new scan, because there’s a few categories there on the sidebar that we can make a use of (please note that these options on the SideBar are almost the same for most templates, it might vary a little with few additional options for some scanning templates in Nessus)

Through the option Schedule, once Enabled, you can choose the frequency of the scan (which consist of Once, Daily, Weekly, Monthly or Yearly - this is only possible if you’re on Nessus Professional). Assuming i am on that package, in my example below i chose Daily, I can choose when it should start and how often it should repeat, i can also instead have it scanned once in 2 or 3 days

As for the Notifications option on the SideBar, you have the ability to send status notifications particular email addresses, however for that to be possible you’ll need to configure the SMTP server. So you’ll need to provide SMTP credentials.

For the Discovery option, we can choose to have which kind of scan type. Available ones are Host Enumeration, OS Identification, Port Scan (common ports), Port scan (all ports - this will scan all the known 65535 ports) and Custom scan.

If i choose Port Scan (common ports), it’s showing the details on how the scan will be carried out, the types of pings that will be utilized and in this case it uses TCP, ARP and ICMP (please note that it’s set to 2 retries)

Under the Report option, you’d be able to customize on how your report will look or what data will be visible within the report, as you can see below i left the default option as it is where the report will Allow users to edit the scan result and it will only Display hosts that respond to ping. Other options are not ticked.

Under the Advanced option, you have the ability to modify the performance options. You can choose the Slow the down the scan if network congestion is detected (this is very useful if any networks are being used by critical users, employees to prevent any further slowness in the network)
You can also modify the Network timeout in seconds, the Max Simultaneous checks per host, Max Simultaneous hosts per scan and that’s pretty much it with these options

Now let’s perform another scan from a different template
Basic Network Scan

From the template scan, go ahead and choose Basic Network Scan’s template. And then go ahead to fill up the required information, in my case the name of the scan would be Basic Network Scan and target is the IP range of my home network which is 192.168.100.1/24

I launched it and waited for a few minutes, approximately 10 minutes for the scan to be completed. Below is the result of the scan:-

As we can see here, it’s a little different from the Host Discovery Scan that we did in Article 1. Main difference here would be the vulnerabilities shown. Let me click on my machine which is 192.1168.100.91 (1st on the list in above screenshot) to see its vulnerabilities.

The first one seems to be having the highest criticality, we shall see what’s the details of it

So as shown above, the description of the vulnerability is shown in which it gives us a brief summary of the issue. It says that our security setting is not enabled for SMB signing. A solution to this issue is also given (which is very helpful), and we’re asked to enable the policy setting.
I accessed Local Group Policy Editor from my Windows Menu and enabled it as below (i accessed this setting as per below path shown on left)

So now let’s have a look again at the result to see another device’s vulnerability. I’ll be choosing the 2nd one shown here

I’ll be clicking on the 1st vulnerability shown below as that seems to be the most critical

So similarly, the description of the vulnerability is given together with the solution. But i’ll not be taking any action for this as this is my home router and it does specify in the solution below that nothing is required to be done if this device is a router

I’ll not be discussing about other devices shown in the result as most of the vulnerabilities shown for those are categorized as Info
And lastly if i would like to generate the report of this scan, i can simply do so by clicking on the option Report on top right and choose the format of the reporting (it’s either html or csv).


I’d be going with HTML and get the report generated


Such reports could be useful, as for example I'm in the red team who’s doing such vulnerability scans on the devices, I can pass on the report to the blue team who’d probably need it to get the rectification done.
I’d not be able to perform other scans, it’d be quite pointless as I have fairly limited devices in my home network at the moment.
That’s it from me for Nessus at this moment. I’ll surely come up with more articles about it if there’s a good number of devices in my home network (even better if there’d linux or windows server)